At FredFloris, we believe that every accessory should be a reflection of your personal style. That’s why we offer the option to personalise your leather product at no extra cost with our heat imprint/debossing service.
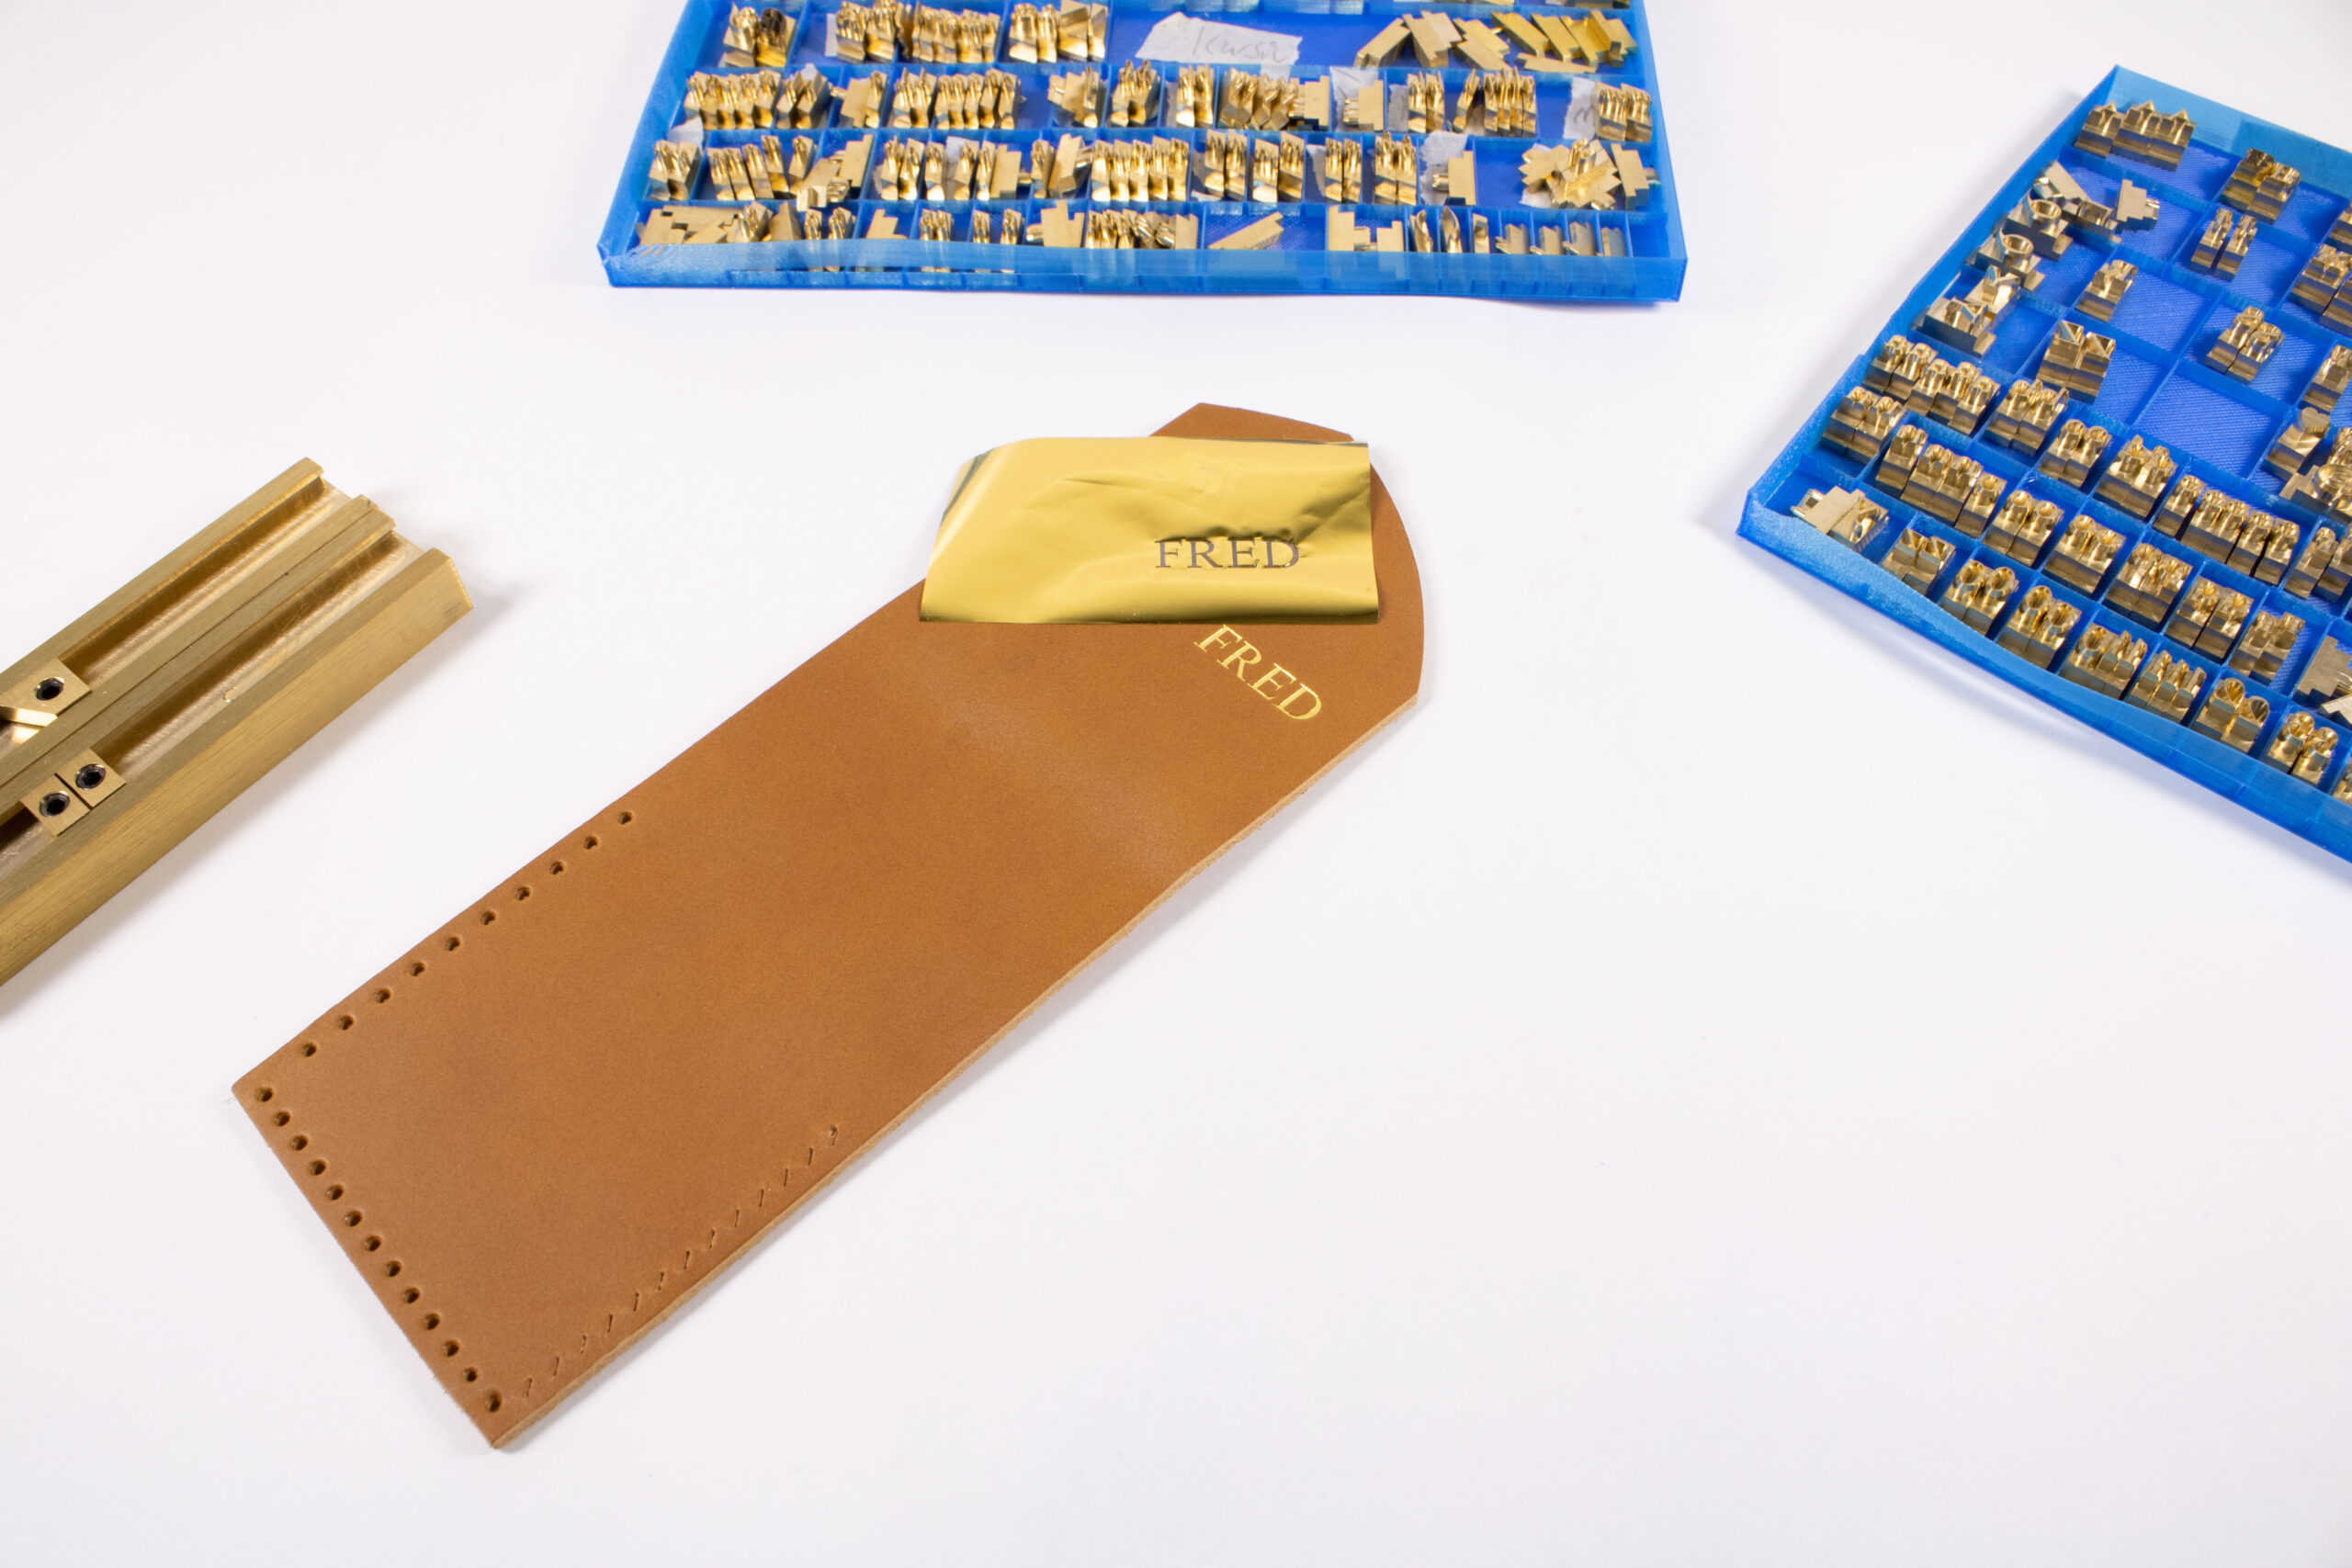
How It Works: Our heat imprint/debossing process involves heating up brass letters and pressing them into the leather. This creates an indentation on the leather, leaving a lasting imprint that adds a special touc. You can choose between gold metal foil debossing or plain heat debossing (also called blind debossing).
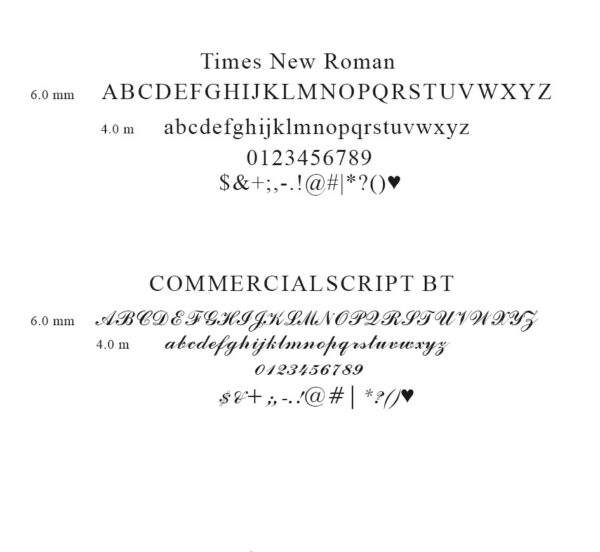
Font Options: We offer two font options for your personalised goods: Times New Roman and a cursive handwriting that is very similar to Commercial Script BT. Times New Roman is a classic and timeless font, while the cursive handwriting adds a touch of elegance and sophistication to your product.
Letter Options: You can choose from A-Z English letters in both large and small sizes and Numbers 0-9, Symbols (. & , – ‘), allowing you to add initials or a name to your product.
Recommendations: To make the most of our personalisation service, we recommend adding initials or your first and last name to your FredFloris product. This adds a personal touch and makes your product truly one-of-a-kind.
800+ Google Font: Ready to use
Shapes: High-quality and pre-designed shapes, drag and drop.
Great UI/UX: Simple and straight forward user-friendly program.
For commercial reasons it is only possible to choose google fonts from the customizer. We can also do most of the fonts that are installed in default Microsoft Windows. Please contact us for custom order.
The application installed on our servers are currently located in Germany. Your information and designs will not be shared or stored with a third-party.
The customizer is a standalone system integrated into our website. The customizer has its own cart that you can use to checkout. In the customizer you can see and change between all products that are available for personalizing. You can view and edit designs that have already been added to the cart in the application. If you close the application and reopen it, you will still see your designs and will be able to edit them if you have added them to the cart.
We use SVG or PDF files in the customizer instead of real images of the products, we do this as these filetypes are better in maintaining the integrity and size of your design thus making the end result as close as possible to your design. We reserve the right to make small changes in your design if we believe that the end result would be better, this can include changing the size of the font or moving the text. We will contact you in case there is a need for a larger change in your design. Small variations between your design and the actual laser engraving might still arise, this is not a valid reason for making a complaint claim.
On most designs we have added borders that you need to stay within when adding your texts and shapes.
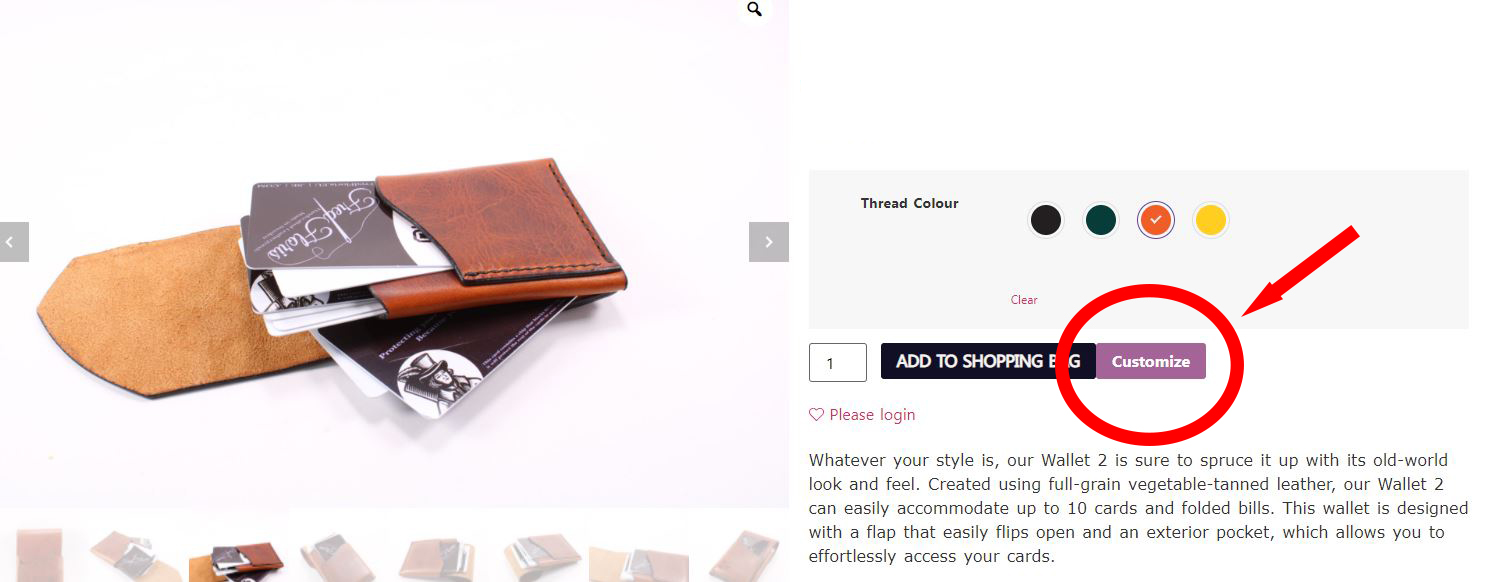
You will gain access to the customizer application by clicking on the customize button on the product pages (see image 3), the button will only be viewable on products that we offer personalizing on, which is most of the leather products that we make.
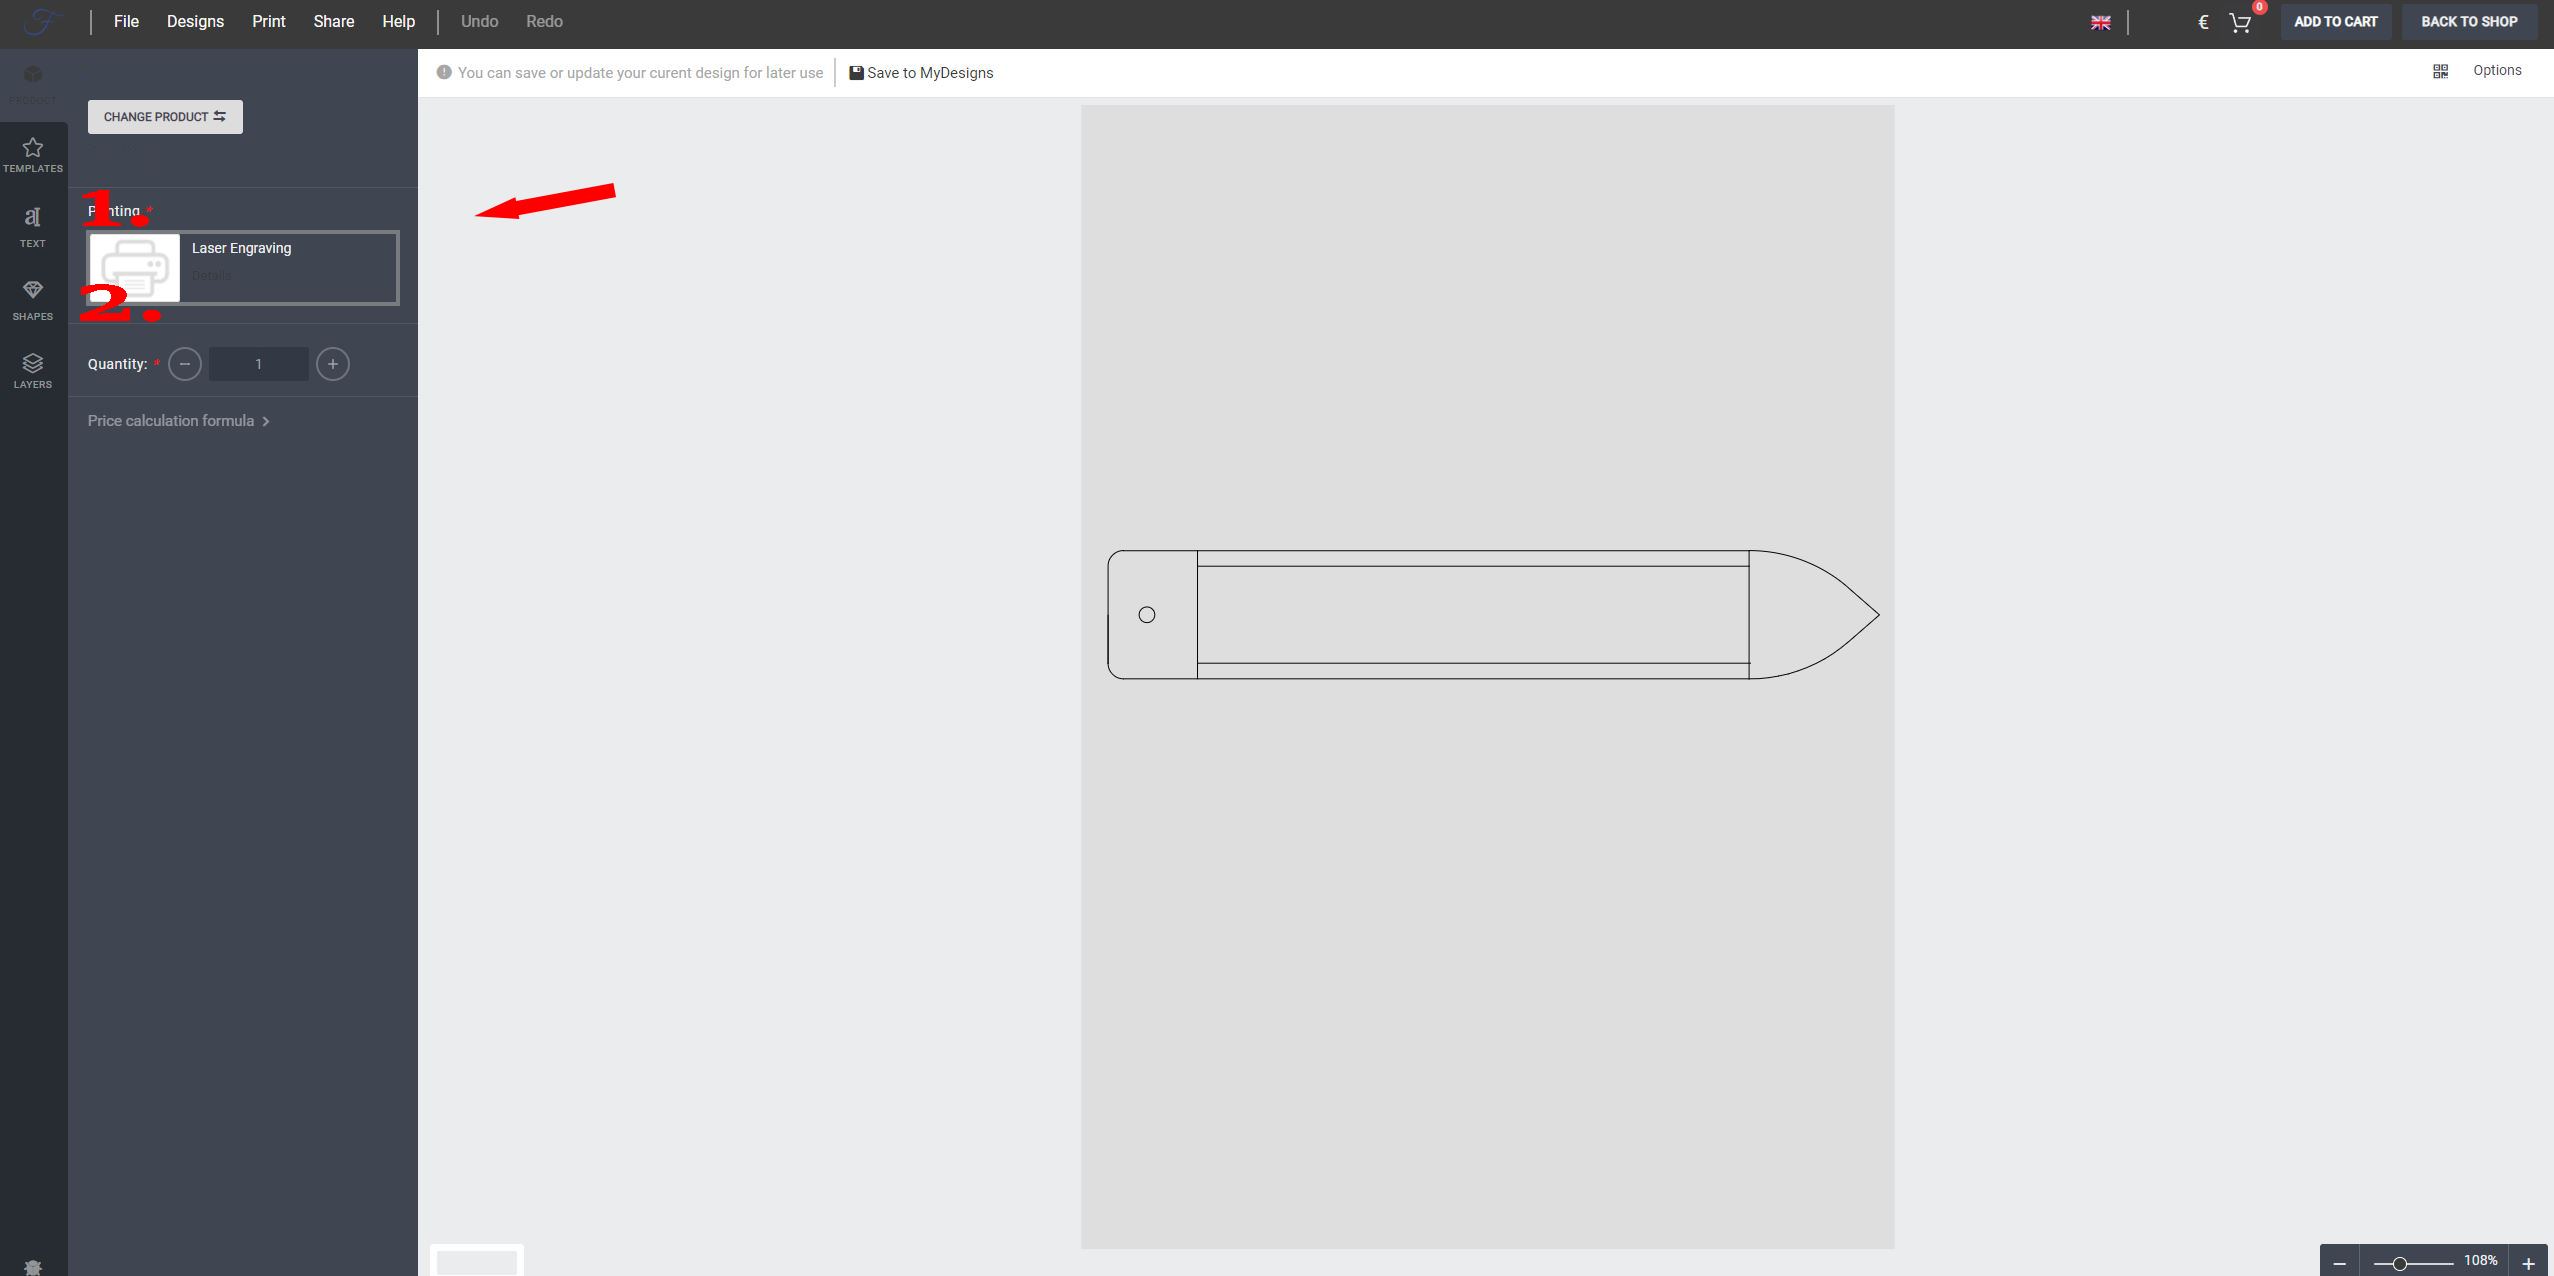
When opening a product in the customizer, it will look as in image 4. Here you find options like selecting fonts (marked 1) and shapes (marked 2) to add to your product. You can also change the design between any added product by pressing the “Change product” button. You can also change quantity if you want to have more than one of the same designs. It is only possible to alter the quantity in the customizer application.
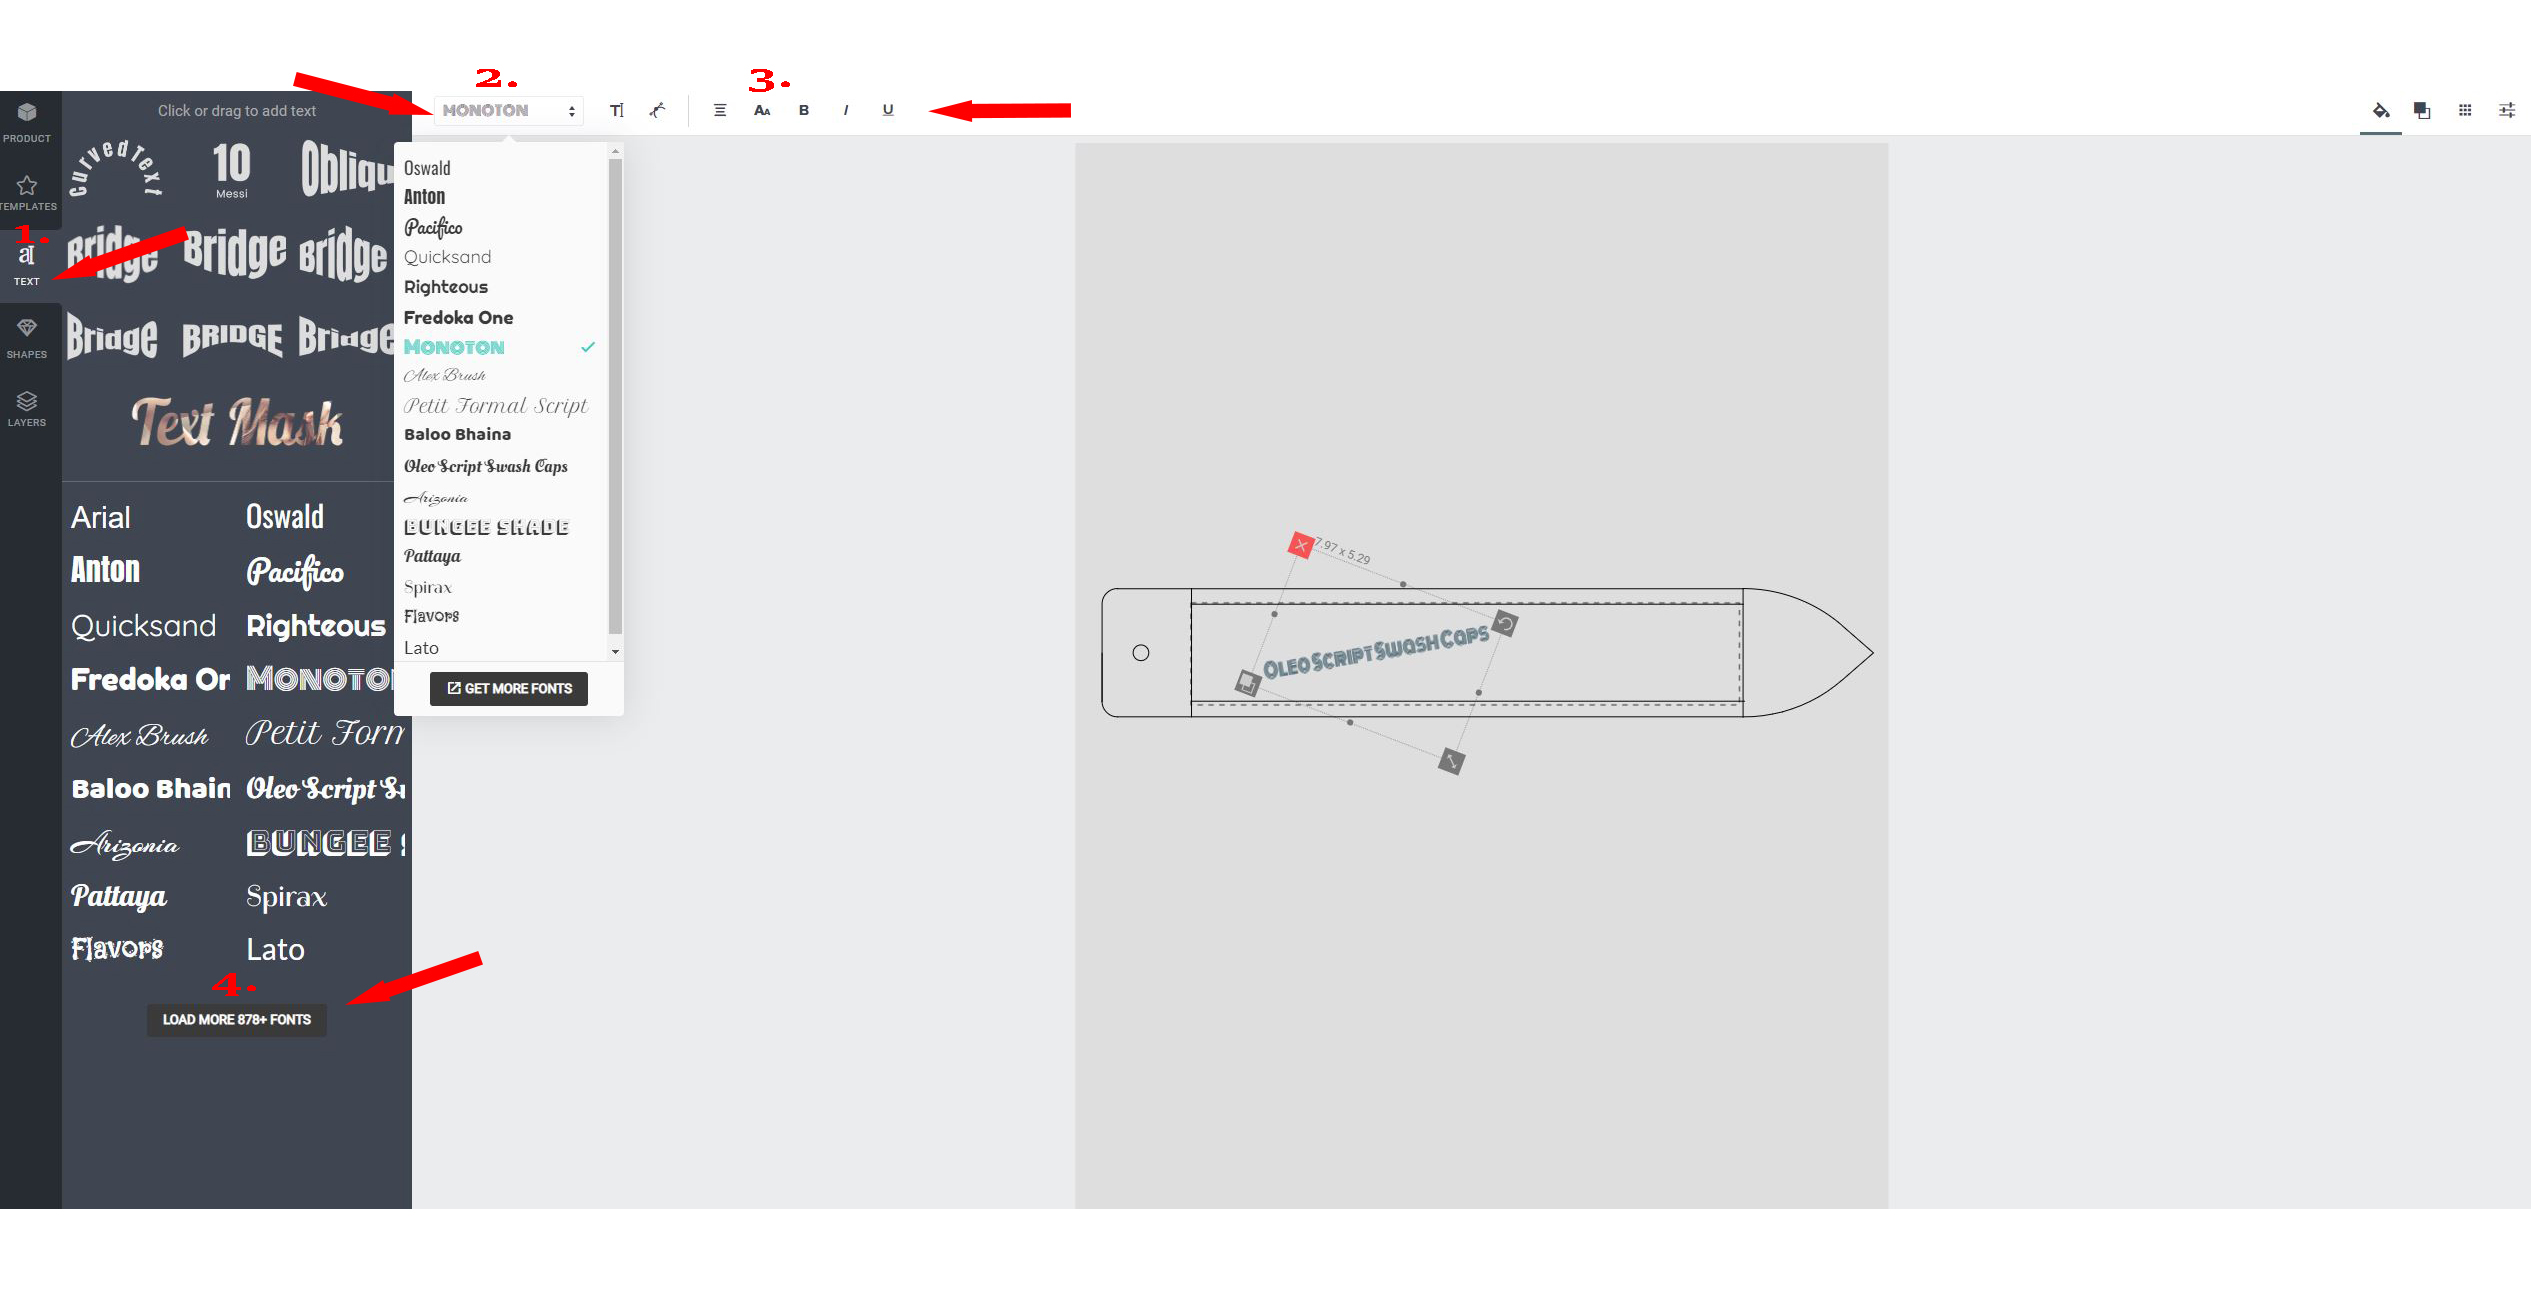
Press on the ‘text’ tab (marked 1. On image 5) to access available fonts. Click or drag on a font to add the text to the image.
You can also change the font on already added text by selecting a font from the dropdown menu (marked 2. On image 5). You need to mark the text that you would liked changed first before choosing from the dropdown.
On the tab (marked 3. on image 5) you will find options like adding text effects, altering text size, letter spacing, and line height. You can also shift between uppercase and lowercase, making the text bold, italic, and underlined. You need to mark the text that you want to alter before pressing the buttons.
Press ‘Load more fonts’ (marked 4. On image 5) to view and add more fonts. You may also set the font size/weight and other font settings (see image number 4).
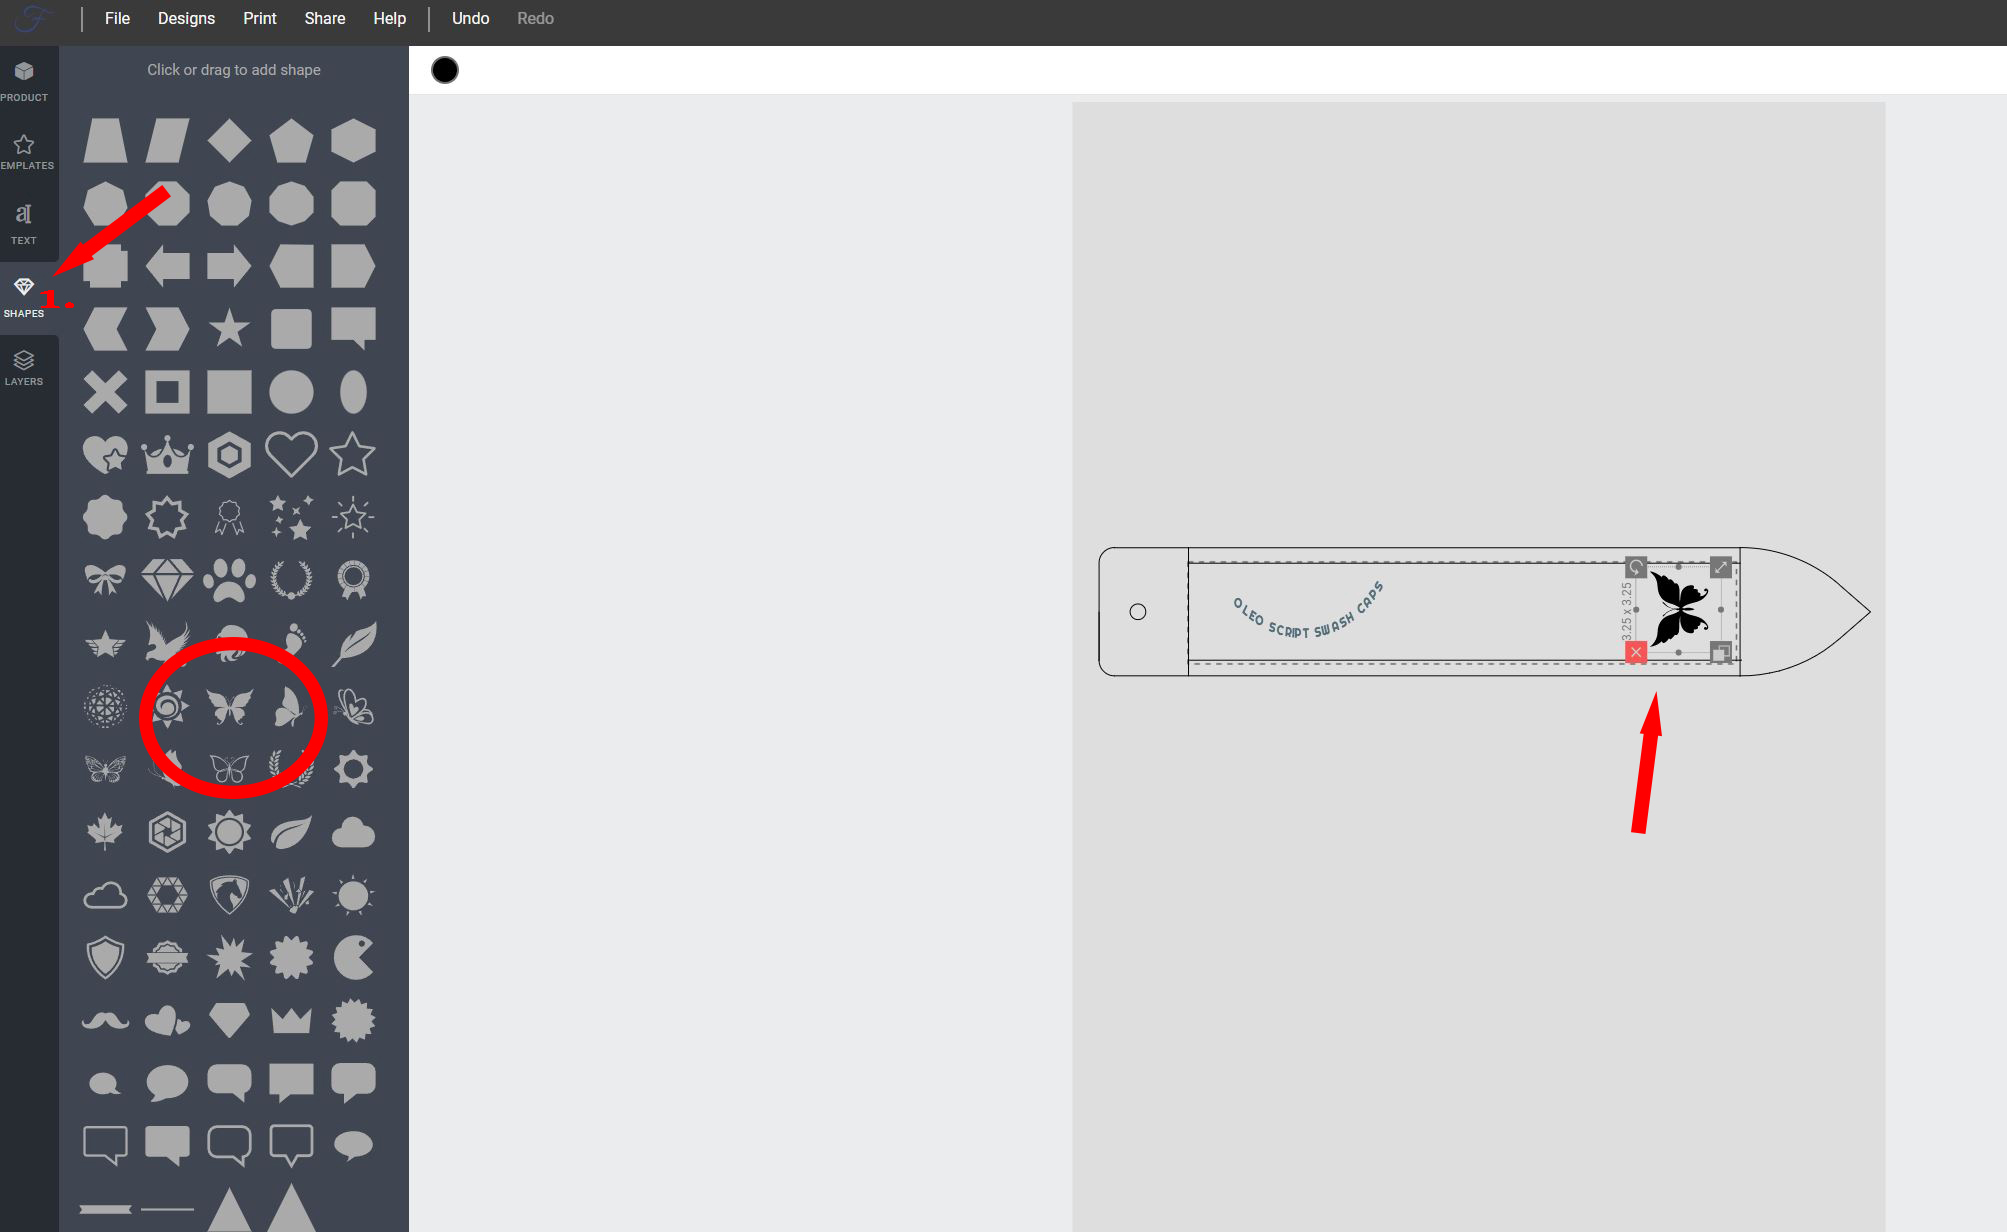
You may choose between a number of different shapes to add to your product design. To do so, you need to gain access to the shape library by pressing on the button ‘shapes’ (marked 1. On image 6.) then drag and drop the shape to your design. You can also change the size and rotate the shape as needed.
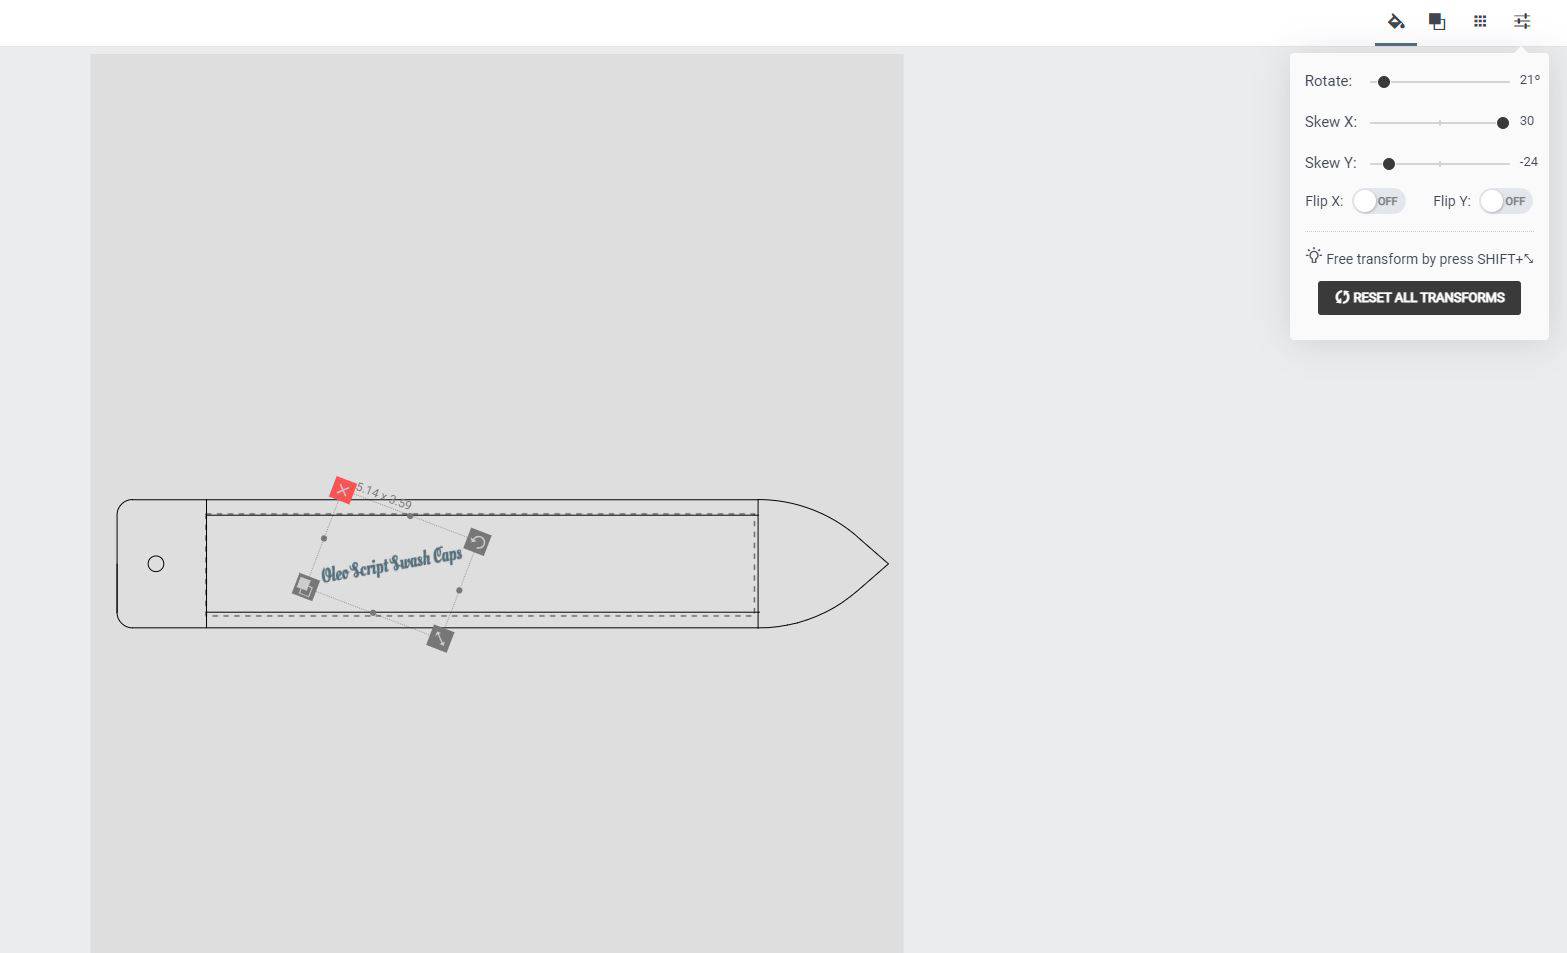
On the right side in the application, you will find a number of different options to rotate your text in different directions (see image 7)
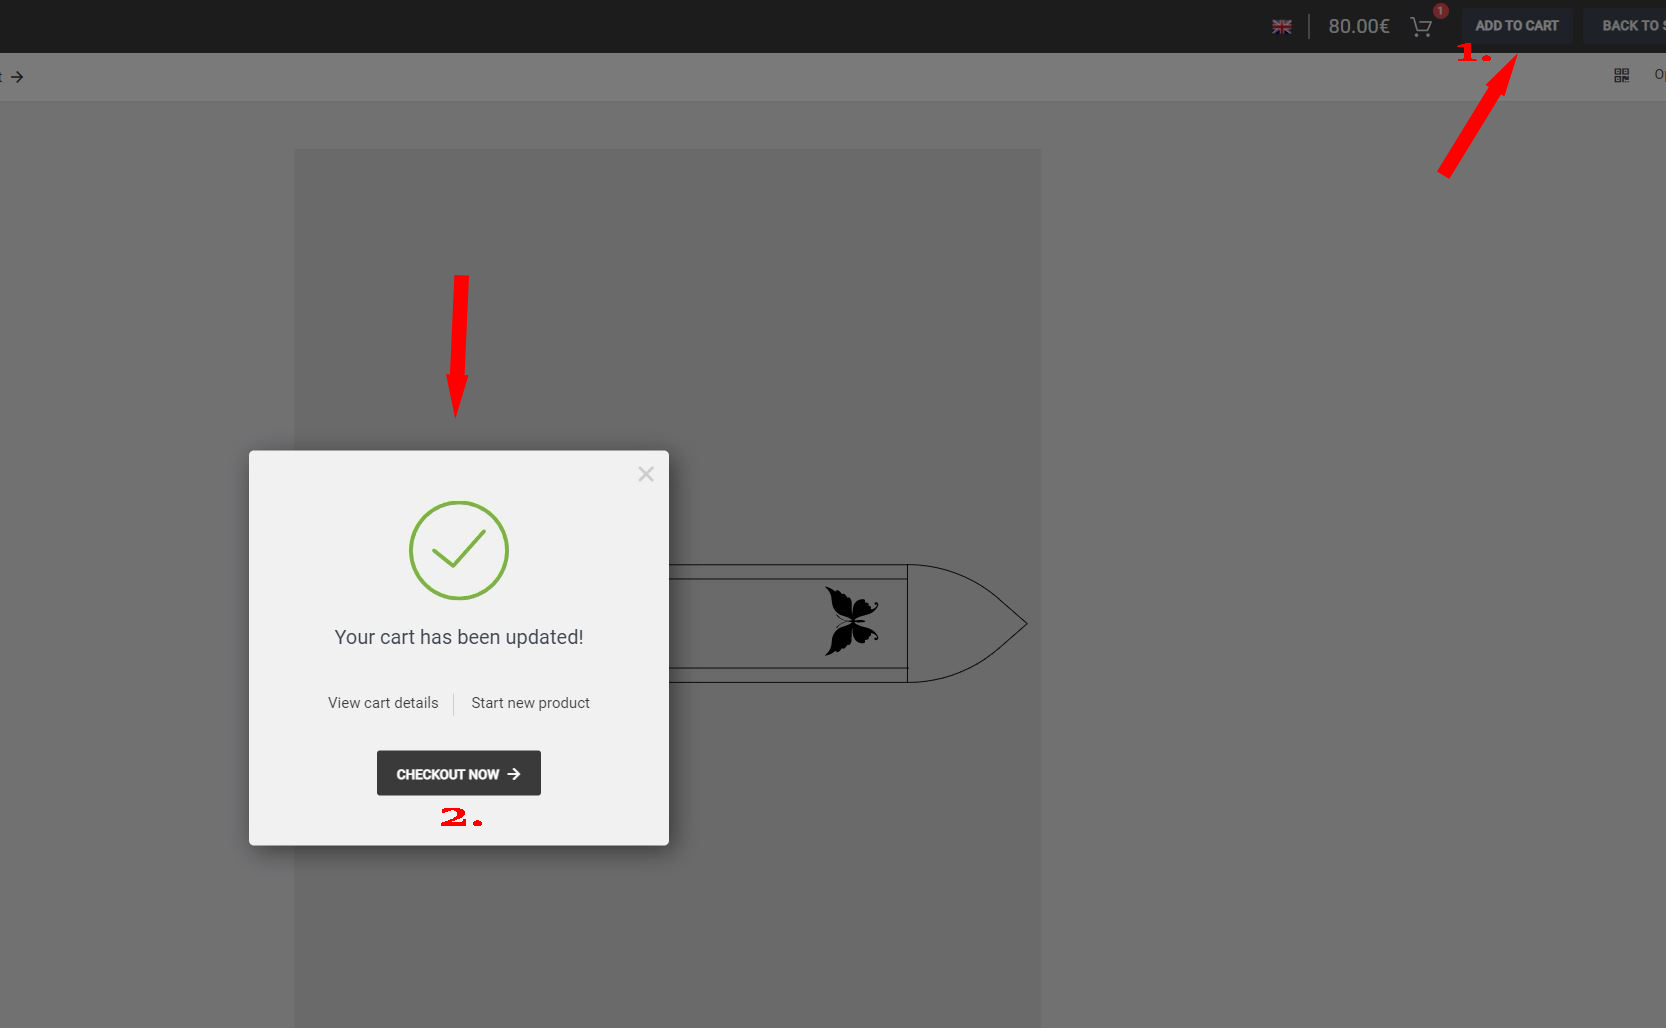
When you have finished designing your product you need to add it to the customizer cart and then checkout. You will find these options on the upper right side in the application. Press the ‘Add to cart’ button (marked 1 in image 8) this will create a popup window that verifies that your product has successfully been added to the customizers cart. From here you can choose between “customize another product” or “checking out” (marked 2. in image 8) by checking out you will go back to the FredFloris store page and your designs will be added to the shop cart.
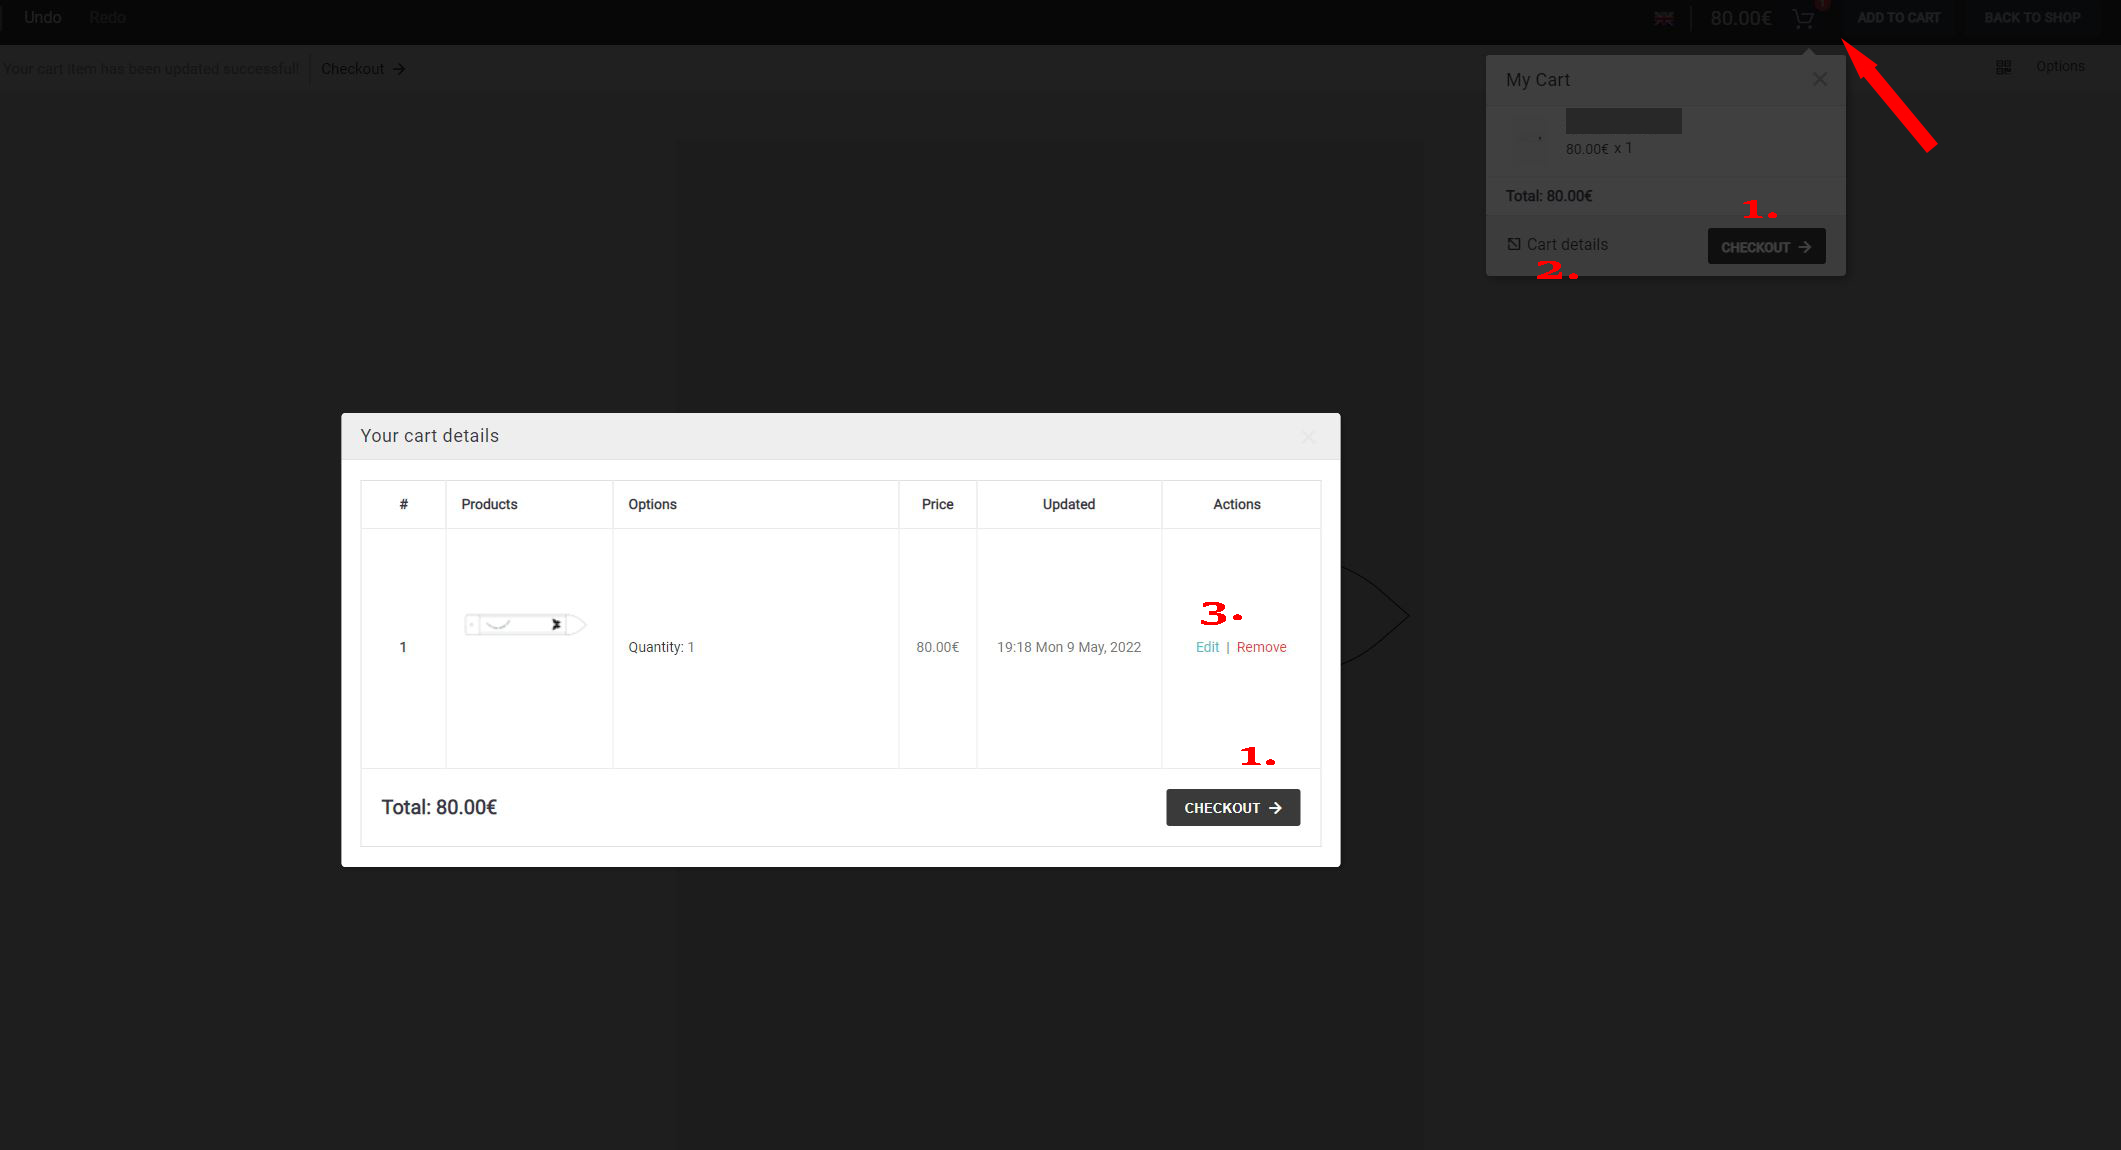
By clicking on the cart icon in the customizer you can view and edit already added designs and checkout to the store cart as well. By pressing on the ‘cart details’ button (marked 2. In image 9) you will see a list in which you can edit and remove added designs (marked 3. In image 9) from these views you may also checkout the customizer cart to the shop cart (marked 1. In image 9)
If you close down the application you will still be able to access your designs again when opening the application, you will then also be able to edit your designs.
If you have any questions regarding the application or need help with your design, please send an email to contact@fredfloris.eu


